Introduction
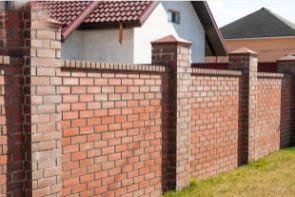
The use of brick columns instead of concrete columns enhances the architectural elegance. The cross-section of the built brick columns might be round, rectangle, square, or elliptical. These can be built to the required height. Corner pillars, porch columns, boundary gate pillars, and free-standing columns are all possible uses for these columns.
When compared to concrete column construction, brick column construction is quick and uncomplicated, requiring fewer tools and labor.
When compared to R.C.C. columns, the brick column is a more cost-effective option. The success of building a long-lasting brick column comes down to three things: proper planning, the right tools, and knowledge on how to build a brick column.
How Many Bricks are in A Column?
4 bricks per course are required for a 12′′ x 12′′ brick column, and 6 bricks are required for a 16′′ x 16′′ brick column. By merely veneering the bricks around a block column, you can save a lot of time and material when building a bigger column.
How to Build Your Own Brick Column
Set The Height And Width Of The Brick Column
The first step is to figure out how tall and wide you want your brick column to be. These measures aid in calculating the number of bricks and mortar required to construct the columns.
Layout Preparation on the Ground
Initially, a temporary rod marker must be used to pinpoint the location and center of the pillar or column on the ground. This marking will assist in supporting the vertical and horizontal alignment of the nearby pillars.
Foundation and Excavation
Excavation is carried out in order to construct the ground support. The depth of the excavation is determined by the foundation's thickness and the type of masonry used. If the masonry does not require reinforcement, a basic concrete bed of an appropriate mix is poured into the excavated area.
Masonry Column Brickwork
The brickwork is started when the foundation layer has been cured. The first-class bricks are utilized in conjunction with a 1:4 cement mortar. This is enough to securely transfer the loads to the foundation. The bricks must only be laid after they have been wetted by dipping them in water. For severe moisture conditions, certain brick column layers require a damp-proof coating. With the help of a plumb bob and compass, the brick is set vertically upwards while ensuring verticality and horizontal alignment.
Curing Procedures
Depending on the construction, the brickworks must be properly cured for 7 to 10 days.
Plastering, Finishing, and Painting are the Next Steps.
The majority of the brick column construction would look nice without plastering. It can, however, be plastered and completed if necessary. They can be painted if necessary.
Brick Columns with Reinforcement
By adding reinforcement into the brick masonry, the columns may be built. The method of inserting reinforcement into brick masonry will aid in the improvement of the column's load-bearing capability. In contrast to concrete design, this style of construction necessitates the use of reinforcement bars.
Special grooved bricks are used, which have a facility for the reinforcement to be placed. The reinforced brick column's construction specifications are shown in figure-4. Grout/mortar is used to fill the void space through which the reinforcement is passed, resulting in a monolithic unit.
Conclusion
You'll need to conduct some little touch-ups as you go along with the brick construction, such as filling in or tuck-pointing the joints with mortar (the same mortar you have used for laying the bricks, but perhaps in a thicker consistency). Make sure the mortar isn't too dry. After you've finished, try to do the tooling (every 4-5 courses).
Concave or raked-out (square recessed) joints are the most prevalent kind of joints. After you've finished tooling the brick joints, smooth off the surface of the mortar with a soft whisk brush.


